01. December 2015

dotconf

dotconf (GitHub: yoannmoinet/dotconf, License: MIT, npm: dotconf)

demo

Are you also tired of all the .something config files for all the tooling we need which is cluttering up your tree? Well Yoann Moinet made a solution for this problem, dotconf.

What is does is bundle all your existing .something files and directories into one .conf. Yoann uses the term “One config to rule them all”. Since I’m a big Lord of the Rings fan, this slogan catch my attention. After trying it our in some projects I really enjoyed how it cleans up all the config files in my tree view.

The CLI is very easy, use -a to ‘archive’ all the .something files and -e to extract them again. Besides that it comes with a bunch more options to specify that way it should behave such as: destination, pattern, safe mode and what to ignore.

30. November 2015

Microm

Microm (GitHub: zzarcon/microm, License: MIT, npm: microm, bower: microm)

Microm is a wrapper of few audio converting libraries to expose a Promise and Event oriented API. The goal of the library is to make it more trivial to play and convert audio in the browser. Besides that I would say this work in some Electron application.

Microm uses the following libs:

  • lamejs mp3 encoder in javascript
  • webrtc-adapter Shim to insulate apps from spec changes and prefix differences
  • RecordRTC record WebRTC audio/video media streams
  • RSVP Provides tools for organizing asynchronous code

In order to get the user recorded data, it use webrtc-adapter and RecordRTC to provide some shims and tools to make it easy to work with multiple browsers. Next they use lamejs to convert Wav to Mp3 and finally to provide a Promise based API, it uses RSVP to support the Promises/A+.

Let’s look at some example code. When you want to record the browsers microphone you can use the startRecording like so:

const microm = new Microm();

microm.startRecording()
      .then(() => { console.log('recording...')})
      .catch(() => { console.log('error recording')});

Because we want to do a bit more then just record, let’s play it back to the user. To do that we need to do this: We do this like so:

microm.stop()
      .then((result) => { microm.play() });

If you want to provide you user with a download of the recording can use the download method like so:

microm.stop()
      .then((result) => { microm.download('my-voice') });

Alternatively you could save the recording to a server by posting a base64 encoding of it.

microm.getBase64().then((base64string) => {
    $.ajax({
        type: 'POST',
        contentType: 'application/octet-stream',
        mimeType: 'audio/mpeg',
        processData: false,
        url: 'http://some.serv.er/upload-audio',
        data: base64string,
        success: someSuccessCallBack
    });
});

Besides recording, playing and downloading you want to give the user some feedback. We can use the events emitted by the library to present the user with feedback.

By attaching the on listener we can listen for this list of events:

  • timeupdate
  • loadedmetadata
  • play
  • pause
  • ended

By example:

microm.on('timeupdate', updateCurrentTime);
function updateCurrentTime(time) { console.log(time); }

26. November 2015

react-pull-to-refresh

react-pull-to-refresh (GitHub: bryaneaton13/react-pull-to-refresh, License: MIT, npm: react-pull-to-refresh)

react-pull-to-refresh is a library that does exactly what the name implies. It gives the pull to refresh behavior. demo

It is based on the library that Andy Peatling made and wrote a post about. You can find that here. So let’s take a look at how it works, your refresh handler takes in resolve and reject to tell the component when it’s finished. That would look something like this:

handleRefresh(resolve, reject) {
    // do some async code here
    let success = false;
    if (success) {
        resolve();
    } else {
        reject();
    }
}

And this is what the component would look like:

<ReactPullToRefresh
    onRefresh={this.handleRefresh}
    className="your-own-class-if-you-want"
    style={{ textAlign: 'center' }}>
        <h3>Pull down to refresh</h3>
        <div>{items}</div>
        <div>etc.</div>
</ReactPullToRefresh>

Basically that is all that there is to it. For the American readers I hope you have a nice Thanksgiving.

25. November 2015

Vue.js

Vue.js (GitHub: vuejs/vue, License: MIT, npm: vue

Vue.js is a library for building web interfaces. Because it works together with some other tools, you can also call it a “framework”. Now, if you’ve never heard of or used Vue before, you are probably thinking: great, yet another JavaScript framework! I get it. That was my first thought as well, that is why I never looked at it with a serious eye. Vue isn’t particularly new, it has being in the making for almost two years now, and the first public release was in February 2014. Over time it has evolving into a great engine to build beautiful production ready app with.

What makes it so awesome? Well, it supports all the features we are used to from libraries such as React, Ember and Angular but it’s size and api are a lot simpler. A thing I love in libraries, simplicity.

So let’s take a look at a few small examples and let’s start with data binding.

This is how we define the template which we are gonna use:

<div id="binding">
    <p>{{message}}</p>
    <input v-model="message">
</div>

And here we give it some data:


let binding = new Vue({
  el: '#binding',
  data: {
    message: 'Daily Javascript'
  }
});

This would give is a div with an input field and a preview of the value it holds. When you start typing, Vue will take over from there. That’s cool right? Ok I get it data binding does not impress you anymore. Do you like working with components? Vue takes an approach that is very similar to React: it’s components all the way down.

const Example = Vue.extend({
    template: '<div>{{ message }}</div>',
    data () {
        return {
            message: 'Daily Javascript!'
        }
    }
});

// register it with the tag <example>
Vue.component('example', Example);

Now we can use it like this:

<example></example>

Because modularity is key nowadays it comes with the opportunity to scope styles to a component. That would look something like this:

<style scoped >
.message {
  color: red;
}
</style>

Here is a full example component of how it would look when you would have it setup with a combination of Webpack and vue-loader.
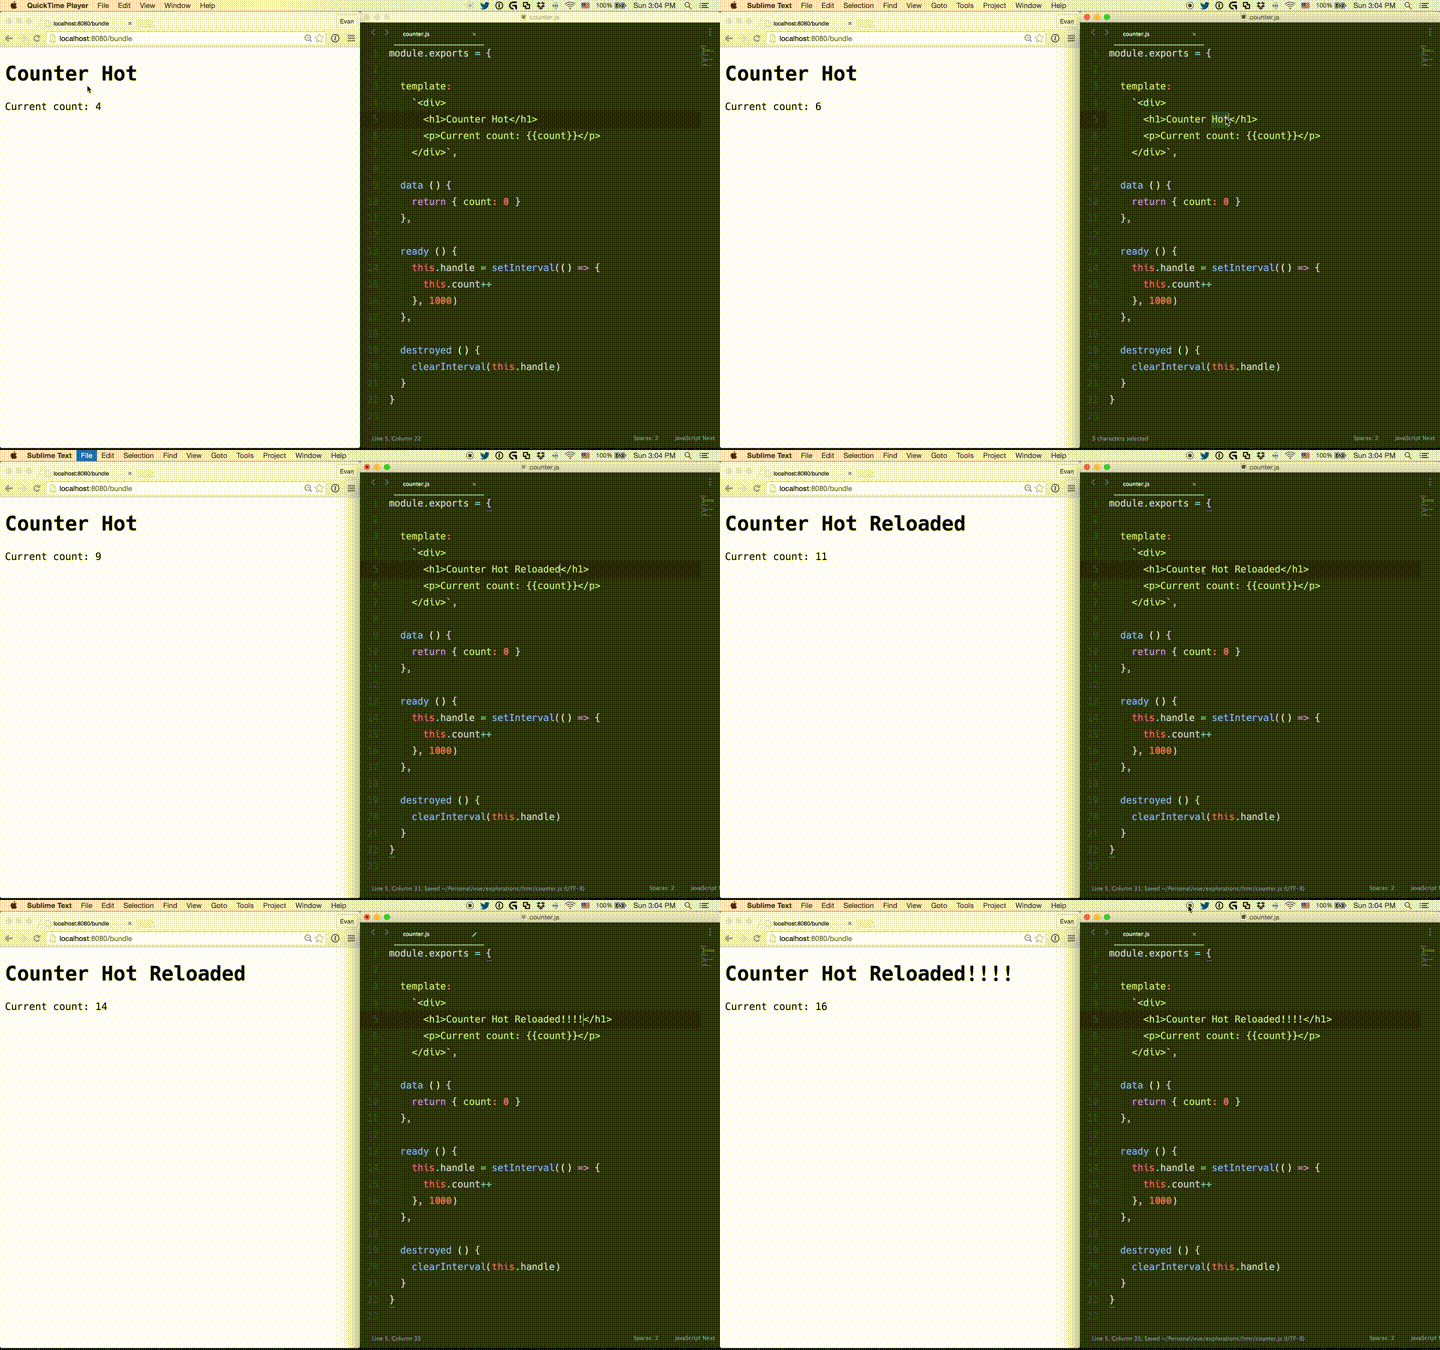
demo

It comes with a lot of more features that I will not go into such as routing and a build-in transition system.

There is a demo for the transition system which demonstrates state-based tweening with Vue:

See the Pen Vue.js elastic header component by Evan You (@yyx990803) on CodePen.

24. November 2015

Vectorious

Vectorious (GitHub: mateogianolio/vectorious, License: MIT, npm: vectorious)

Vectorious is a high performance linear algebra library written in Javascript. It is available via npm or just as a script so you can include it on your page.

Since I’m not a mathematician and did not do a lot of linear algebra, you will have to bare with me. I will try to give you a good description of what this library can do.

It has two mayor API endpoints to work with: Matrix and Vector. The constructor functions for both these functions can be called with a range of different arguments. Since 2.1.0 Vector implements JavaScript typed arrays for increased performance. The default Vector type is Float64Array, but this can be specified upon creation.

We would work with it like so:

import { Vector, Matrix } from 'vectorious';

let vector, matrix;

// Create an empty vector of default type Float64Array
vector = new Vector();
/* Vector { type: [Function: Float64Array], length: 0 } */

// Create an empty vector of type Uint8Array
vector = new Vector(Uint8Array);
/* Vector { type: [Function: Uint8Array], length: 0 } */

matrix = new Matrix();
/* Matrix { type: [Function: Float64Array], shape: [] } */

vector = Vector.zeros(5);
/* Vector {
  type: [Function: Float64Array],
  length: 5,
  buffer: ArrayBuffer {},
  values: Float64Array { '0': 0, '1': 0, '2': 0, '3': 0, '4': 0 } } */

vector = new Vector(1, 2, 3, 4, 5);
/* Vector {
  type: [Function: Float64Array],
  length: 5,
  buffer: ArrayBuffer {},
  values: Float64Array { '0': 1, '1': 2, '2': 3, '3': 4, '4': 5 } } */

matrix = new Matrix(vector);
/* Matrix {
  type: [Function: Float64Array],
  shape: [ 5, 1 ],
  data: Float64Array { '0': 1, '1': 2, '2': 3, '3': 4, '4': 5 } } */

matrix = Matrix.zeros(2, 2);
/* Matrix {
  shape: [ 2, 2 ],
  data: Float64Array { '0': 0, '1': 0, '2': 0, '3': 0 },
  type: [Function: Float64Array] } */

The developer posted an example of how you would map a time range over a sinus.

var time = Vector.range(0, Math.PI / 12, Math.PI);
// Which will return
/* Vector {
  type: [Function: Float64Array],
  length: 12,
  buffer: ArrayBuffer {},
  values:
   Float64Array {
     '0': 0,
     '1': 0.2617993877991494,
     '2': 0.5235987755982988,
     '3': 0.7853981633974483,
     '4': 1.0471975511965976,
     '5': 1.308996938995747,
     '6': 1.5707963267948963,
     '7': 1.8325957145940457,
     '8': 2.0943951023931953,
     '9': 2.356194490192345,
     '10': 2.6179938779914944,
     '11': 2.879793265790644 } } */

var sine = time.map(Math.sin);
// Which will return
/* Vector {
  type: [Function: Float64Array],
  length: 12,
  buffer: ArrayBuffer {},
  values:
   Float64Array {
     '0': 0,
     '1': 0.25881904510252074,
     '2': 0.49999999999999994,
     '3': 0.7071067811865475,
     '4': 0.8660254037844386,
     '5': 0.9659258262890682,
     '6': 1,
     '7': 0.9659258262890684,
     '8': 0.8660254037844387,
     '9': 0.7071067811865476,
     '10': 0.49999999999999994,
     '11': 0.2588190451025206 } } */

Besides the very extensive API it also accommodates extentions such as Solve and Plot. Plot for instance can be used to a two-dimensional SVG plot from two input vectors.